VIDEO TRANSCRIPTION
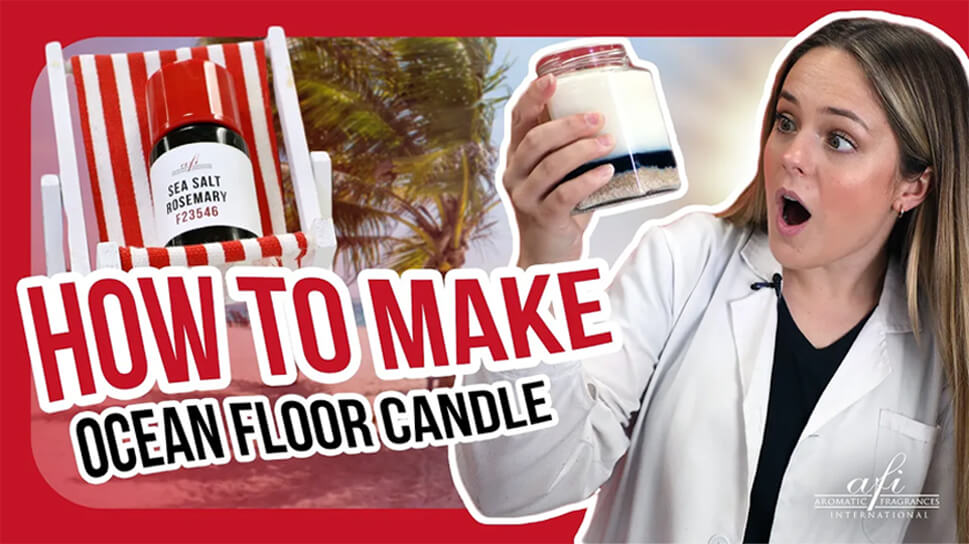
Hey there guys, it’s Maddy here with another fun candle project for y’all to try out! This layered candle is gorgeous, fragrant, and perfect for the summer season. Hit that like button before we jump in and keep watching to find out how to make your very own!
First we need to add our first layer to the candle. To make the bottom of the container look like the ocean floor, add in about a centimeter of sand. You can increase or decrease the depth of this layer if you’d like, but remember to leave plenty of space for your wick!
Up next, we’ll be adding in some gel wax to mimic a layer of deep, blue water above the sand. Gel wax can be tricky to work with, but just remember to keep an eye on the temp and stir gently so it melts evenly but doesn’t form a bunch of bubbles. Add the gel wax into a heat safe container and melt it over a double boiler.
When the gel wax has almost completely melted, grab a heat gun and warm the sides of your container. Be careful not to burn yourself; we just want the container itself to be nice and warm to prevent bubbles in the gel wax.
Now that the gel wax has fully melted, remove it from the double boiler and give the temperature a quick check. We want it to be about 200 to 185 degrees fahrenheit before pouring; any cooler and it’ll start to harden which will make it very hard to pour. While you’re waiting for the wax to cool, add in a single drop of blue liquid candle dye. This stuff is super vibrant so use it sparingly!
Stir in the dye and when the temperature is ideal, pour the wax into the container. Be sure to pour as close to the container as possible to keep bubbles to a minimum. If there are a lot of bubbles present, hit the wax with the heat gun to help the bubbles rise to the top.
Now we can add in the wick! Because this is a larger candle, I’ll be using a wide woodwick that will produce a large enough flame to keep an even burn pool. Tab your wick and check to see if the gel wax has firmed up slightly and when it’s squishy with a little give, press the wick tab into the wax. This should hold it in place.
Finally, we can make the rest of the candle! For our candle, we’re going to use IGI 6006, a parasoy blend that’s easy to work with and has a high fragrance load. Melt down the wax in your double boiler and remove it once it’s fully liquid. Check the temp to see if it’s ready for additives; we like to add them around 185 because it’s hot enough for the fragrance to settle in the wax but won’t burn off.
For this candle, we’ll be using our sea salt rosemary fragrance! With notes of lemon, camphor, and lavender, it’s the perfect refreshing scent for Spring and Summer. Pour it in and stir gently for about a minute to make sure the fragrance is fully mixed in.
Before we pour the rest of the candle, hit the container with the heat gun once again while the wax cools to a pouring temp of about 165 degrees.
When the wax is ready to pour, fill the rest of the candle and you’re just about done! Pour any extra wax left over in the pouring pitcher into a disposable cup so you can top the candle off with a second pour in case you get any wick sinkholes. We find popping the container into an unheated oven keeps the candle insulated and prevents the wax from shrinking as much as it cools, which causes sinkholes.
Awesome, our wax has completely cooled and we’re ready to trim the wick! Clip the wick down to about 1/4th of an inch and your candle is complete!
We recommend allowing your candle to cure for at least a week before its first burn to get an optimal hot throw. And now you’ve got a unique and great smelling candle for your spring and summer line!
This 16 ounce candle cost us about 5 dollars to make, including the wax, wick and other supplies. It can be sold wholesale for 6 to 8 dollars and retail for 10 to 16 dollars depending on the fragrance and additives you use!
Thanks for joining us for another How To here in the AFI Lab! We hope you enjoyed following along; if you did, don’t forget to subscribe and ring that notification bell so you never miss an update from our team. As always, I’m Maddy and I’ll see y’all in the next one. Bye!


